Complete Vocal Chain Using Only Stock and Free Plugins - Professional Results on a Budget
Learn how to build a professional vocal chain using only free and stock plugins. Step-by-step guide with plugin recommendations and settings for polished vocals.

Getting professional vocal sounds doesn't require expensive plugins or fancy gear. With the right chain and some solid free tools, you can achieve radio-ready vocals from your home studio. This guide walks you through building a complete vocal processing chain using only stock and free plugins.
The key to great vocal processing is understanding the order of operations. Each plugin serves a specific purpose, and placing them in the wrong order can actually make your vocals sound worse. Think of it like cooking - you need to prep your ingredients before you season them.
The Foundation: Clean Signal First
Before you start adding character and polish, you need a clean foundation. This means removing unwanted noise and fixing basic frequency issues before doing any creative processing.
Step 1: Bertom Denoiser (Free)
Start your chain with the Bertom Denoiser. This plugin is your first line of defense against room noise, air conditioning hum, and other background sounds that can muddy your vocal.
Run this first because every plugin after it will amplify whatever signal you feed it. Clean up the source, and everything downstream benefits. The Bertom Denoiser is particularly good at removing consistent background noise without affecting the vocal tone.
Download it from the developer's website - it's completely free and works in all major DAWs. Set it to learn the noise profile from a quiet section of your recording, then apply gentle reduction.
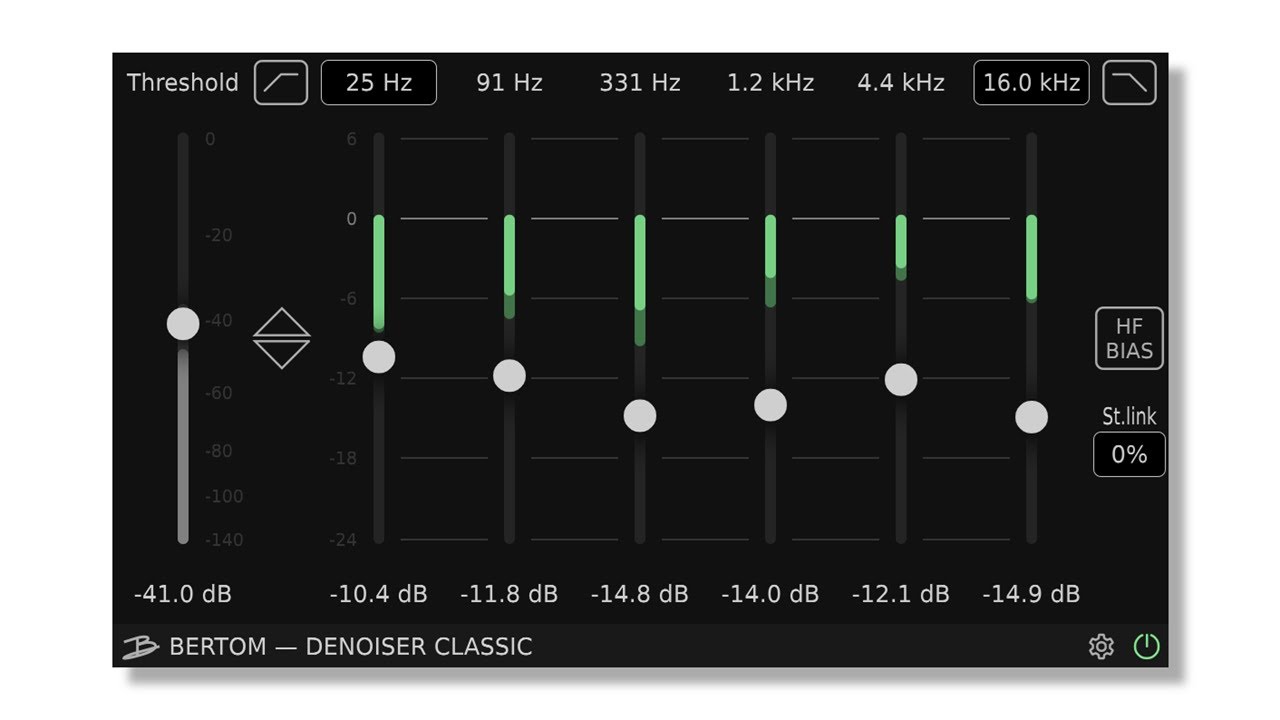
Alternative free options: ReaFir (comes with Reaper, but works as VST in other DAWs), or your DAW's built-in noise gate.
Step 2: High-Pass Filter and Subtractive EQ
Next, clean up the low end with a high-pass filter. Most vocals don't need anything below 80-120Hz, and removing this information cleans up your mix and prevents low-end buildup.
Use your DAW's stock EQ for this. Set a high-pass filter around 80-100Hz for male vocals, 100-120Hz for female vocals. Don't be too aggressive - you're just removing rumble and handling noise.
While you're here, listen for any obvious resonant frequencies that stick out. These usually appear as harsh or boxy sounds around 200-500Hz. Cut these problem frequencies by 3-6dB with a narrow Q setting.
Stock alternatives: Every DAW comes with a capable EQ. Use whatever's included - Logic's Channel EQ, Pro Tools' EQ3, Reaper's ReaEQ, or Studio One's Pro EQ.
Pitch Perfect: Tuning Before Dynamics
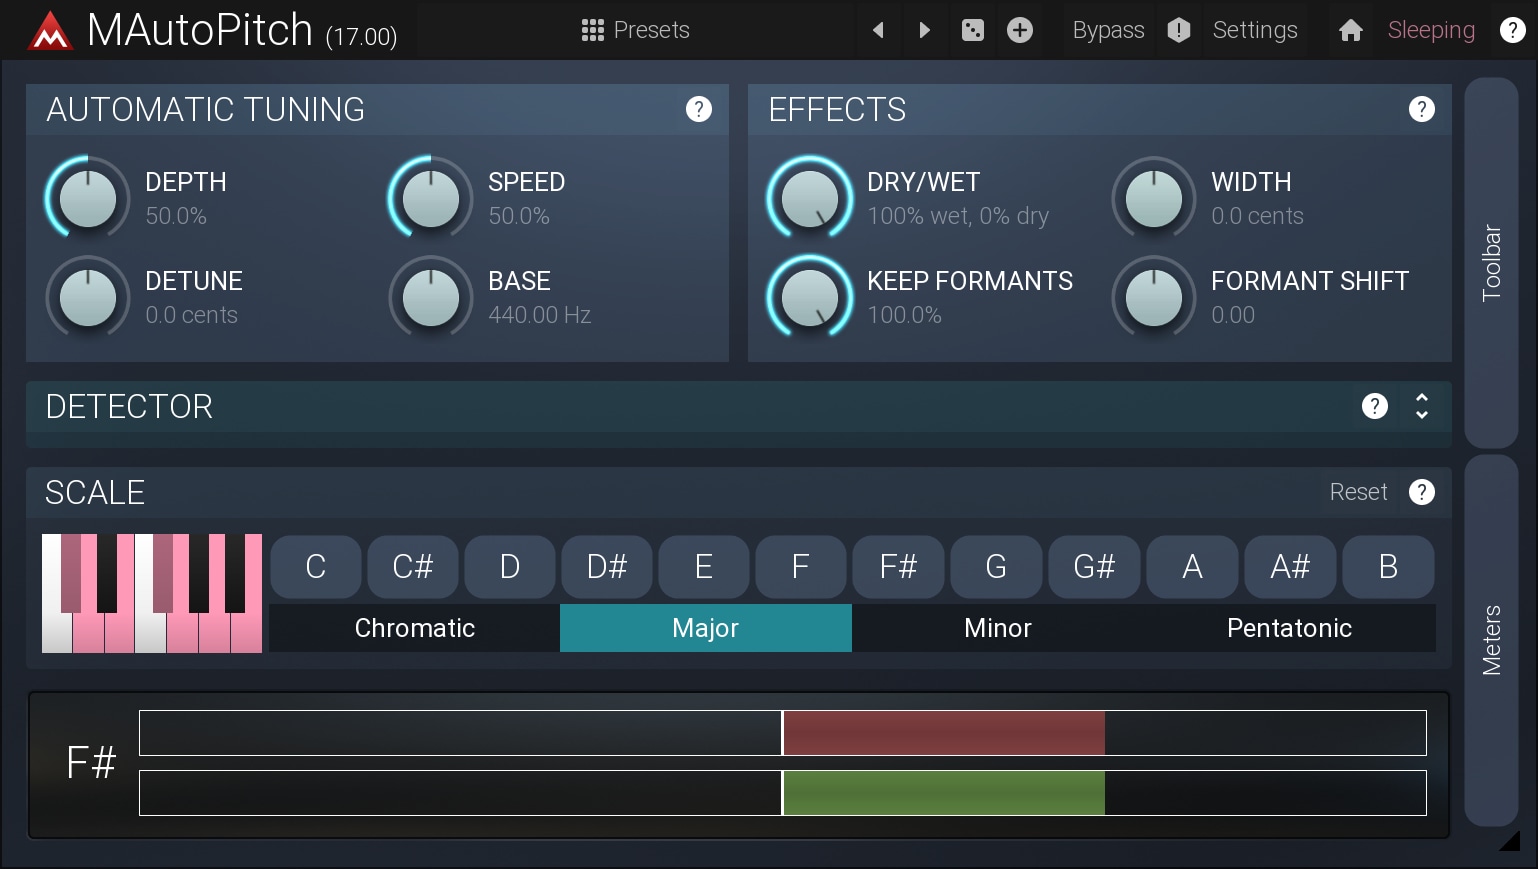
Step 3: Auto-Tune or Pitch Correction
Now that your signal is clean, it's time for pitch correction. This needs to happen before any dynamic processing because compressors and other tools will react to pitch fluctuations.
If you're looking for transparent pitch correction, try MAutoPitch (free from MeldaProduction). For more obvious Auto-Tune effects, Graillon 2 by Auburn Sounds gives you that modern vocal sound without the price tag.
Set your key and scale, then adjust the correction strength based on your needs. For natural correction, use lighter settings (around 50-70%). For the obvious Auto-Tune effect, push it to 100%.
Free alternatives:
- MAutoPitch (Melda Production) - transparent correction
- Graillon 2 (Auburn Sounds) - more creative effects
- GSnap - basic but functional pitch correction
Step 4: De-Esser
Before compression boosts everything in your signal, tame those harsh "S" and "T" sounds with a de-esser. Compression will amplify sibilance, so controlling it early prevents problems later.
TAL-Tube is a great free option that includes de-essing capabilities. Set the frequency around 4-8kHz where sibilance lives, and apply gentle reduction only when harsh sounds occur.
Many stock compressors also include de-essing modes. Logic's DeEsser, Pro Tools' DeEsser, and others work perfectly fine for this task.
Free alternatives:
- Lisp by Sleepy-Time DSP
- Your DAW's built-in de-esser
- Manual automation (time-consuming but free)
Dynamic Control: The Heart of Your Chain
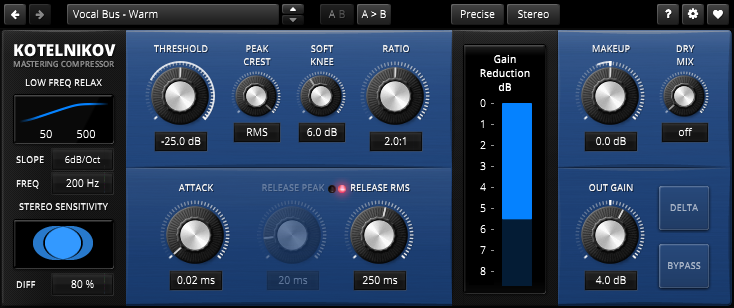
Step 5: Primary Compressor
This is where your vocal really starts to take shape. You want smooth, musical compression that evens out the performance without squashing the life out of it.
Aim for 3-6dB of gain reduction with a medium attack (around 3-10ms) and medium release (50-200ms). The goal is to catch the loudest parts while letting the natural dynamics breathe.
TDR Kotelnikov is an excellent free compressor that rivals expensive alternatives. It's transparent, musical, and gives you plenty of control over your sound.
Free alternatives:
- TDR Kotelnikov - transparent and professional
- Rough Rider 3 - more character and color
- OTT (Ableton Live users) - parallel compression beast
- Your DAW's stock compressor
Step 6: Surgical EQ (Optional)
After compression, you might notice new resonances or frequency buildups. This is normal - compression changes how frequencies interact. Use a surgical EQ to address any new problems.
Keep cuts narrow and specific. You're not tone-shaping here, just cleaning up issues that compression revealed. This step isn't always necessary, but it's good to have in your toolkit.
Adding Character and Polish
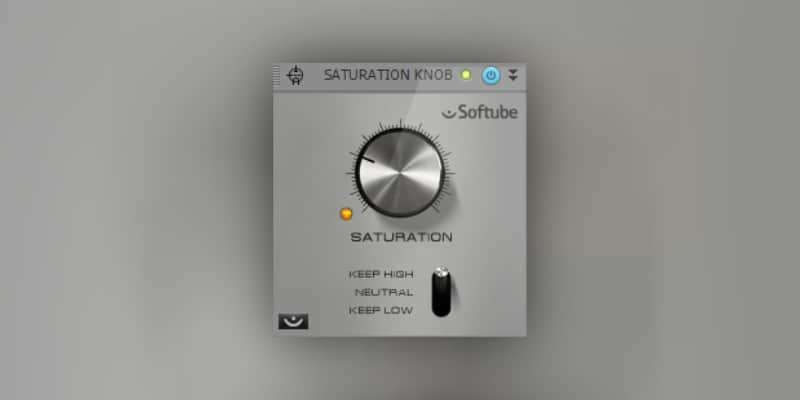
Step 7: Saturation and Harmonic Enhancement
Now comes the fun part - adding character. Saturation adds harmonics that make vocals feel more present and alive. It's the difference between a clean vocal and one that cuts through a dense mix.
Softube Saturation Knob is a simple, free plugin that adds warmth and presence. Turn it up until you hear the vocal getting thicker, then back it off slightly.
Free alternatives:
- Softube Saturation Knob - simple and effective
- Camel Crusher - more aggressive options
- FreeAMP - vintage amp simulation
- Variety of Sound plugins - multiple saturation options
Step 8: Glue Compressor
Add a second, lighter compressor for "glue." This should be more transparent than your first compressor, just gently holding everything together.
Set this for 1-3dB of gain reduction with a slower attack and faster release. You want it to react to the overall level rather than individual transients.
Step 9: High-End Enhancement and Air
This is where your vocal gets that professional polish and sparkle. Adding controlled high-frequency enhancement gives your vocal clarity and excitement that helps it cut through the mix.
The easiest approach is using a gentle high-shelf EQ around 10-12kHz with a 1-3dB boost. This adds air and presence without being harsh. You can also try exciter plugins that add harmonic content to the high frequencies.
Free alternatives:
- High-shelf EQ boost around 10-12kHz using your DAW's stock EQ
- Bark of Dog's free exciter plugins
- Variety of Sound's free enhancer plugins
- TAL-Tube for subtle high-frequency saturation
Step 10: Final EQ Touches
Your last EQ is for tone shaping and final touches. Add subtle presence around 3-5kHz if needed, or air around 10-15kHz. Be gentle since you've already added brightness earlier.
This is also where you'd make any final corrective moves or enhance the vocal's character to fit your specific mix.
Spatial Processing: Sends and Effects
Reverb Send
Don't put reverb directly on your vocal channel. Instead, send it to an auxiliary return so you can process the reverb separately and maintain control over the dry signal.
Most DAWs include decent reverb plugins. Look for hall or plate settings that complement your song's vibe.
Free alternatives:
- ValhallaSupermassive - incredible free reverb
- TAL-Reverb-4 - classic digital reverb sounds
- Your DAW's stock reverb
Delay Send
Like reverb, delay works best on a send. Try quarter-note or eighth-note delays for rhythmic interest, or short slapback delays (80-120ms) for vintage character.
Free alternatives:
- TAL-Dub - vintage delay character
- Your DAW's stock delay
- Valhalla FreqEcho - frequency-selective delay
Final Limiter
End your chain with a gentle limiter to catch any peaks and prevent clipping. This isn't for loudness - it's insurance against occasional spikes.
Most stock limiters work fine for this. Just set the ceiling around -0.3dB and let it catch the occasional peak.
Putting It All Together
Remember that this chain is a starting point, not a rigid formula. Every vocal and every song is different. Some steps might not be necessary, and you might need to adjust the order based on your specific needs.
The most important thing is to use your ears. If something sounds good, it probably is good. Don't feel obligated to use every step if your vocal already sounds great with fewer plugins.
Start with this foundation, then experiment and develop your own approach. The goal is serving the song, not following rules.
Common Mistakes to Avoid
Don't over-process. It's easy to get excited about all these tools and use too much of everything. Start subtle and add more only if needed.
Watch your gain staging. Each plugin should receive and output appropriate levels. Use your DAW's meters to ensure you're not clipping between stages.
Don't set and forget. Automation is your friend, especially for things like de-essing and compression. Different parts of a song might need different amounts of processing.
Taking Your Vocals Further
Once you've mastered this basic chain, start experimenting with parallel processing, multiband compression, and more creative effects. But this foundation will serve you well for most vocal productions.
The beauty of using free and stock plugins is that you can focus on learning the concepts rather than worrying about gear. These tools are more than capable of professional results when used skillfully.
Ready to put these vocal techniques to work with other producers? Join Loopsauce and collaborate with vocalists and producers who understand the craft of professional vocal production.